


Are you wondering how to keep your deep fat fryer in top condition? Well, one way is to first understand how to clean deep fat fryer.
This is because cleaning your deep fat fryer is essential for maintaining hygiene standards and extending the life of your equipment.
In this article, we will discuss a step-by-step guide on how to clean deep fat fryer as well as tips and tricks to remove stubborn stains and keep your fryer fresh.
Let’s dive in and learn how to clean deep fat fryer to keep it in pristine condition!
Supplies Needed for Cleaning
Before discussing further how to clean deep fat fryer, of course you must first know what cleaning supplies you need for this task.
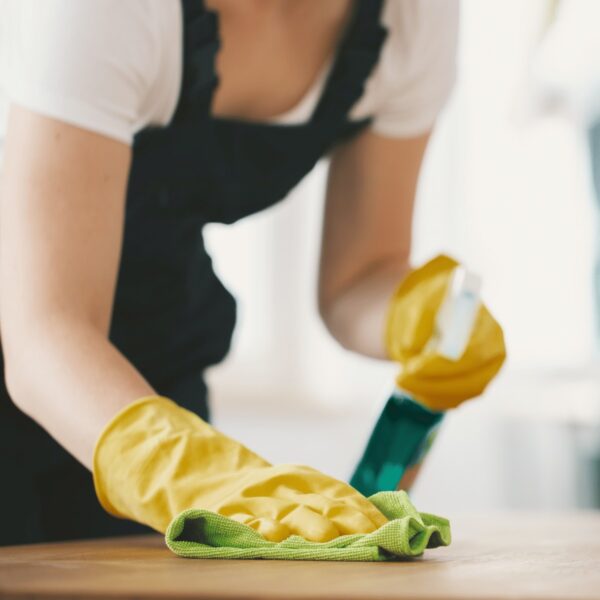
When cleaning a deep fat fryer, essential supplies include a scrubbing brush, protective goggles, heat-resistant gloves, a cloth, and a long-handled brush to ensure both effective cleaning and safety.
Scrubbing brush: The scrubbing brush is necessary for removing built-up grease and food residue from the fryer’s interior surfaces, ensuring thorough cleanliness.
Protective goggles: Goggles shield against splattering hot oil, minimising the risk of eye injuries during the cleaning process.
Heat-resistant gloves: The heat-resistant gloves protect hands from burns when handling hot components like the fryer basket or surfaces.
Cloth: Use a cloth to wipe down exterior surfaces, reducing oil splatters and maintaining a clean appearance.
Long-handled brush: This tool allows reaching deep corners of the fryer, ensuring no areas are left uncleaned.
Additional items that might be useful include a grease-cutting cleaning solution to assist in breaking down tough grease buildup, and a drip tray to collect excess oil and prevent spills during cleaning.
Step-by-Step Guide on How To Clean Deep Fat Fryer
Following a step-by-step guide to cleaning a deep fat fryer ensures that the cleaning procedures are carried out effectively, maintaining the safety and functionality of the equipment. Here is a step-by-step guide on how to clean deep fat fryer that you can follow:
a. Let the Fryer Cool Down
The first step in cleaning a deep-fat fryer is to let the fryer cool down completely to ensure safety and prevent burns when cleaning the fryer base and other parts.
It is crucial to remember that hot oil can cause severe burns if it comes into contact with the skin.
Once the fryer has cooled down, it is recommended to wear a protective apron to avoid any spills or stains on your clothing.
Use caution when handling the fryer components as they may still retain heat even after cooling.
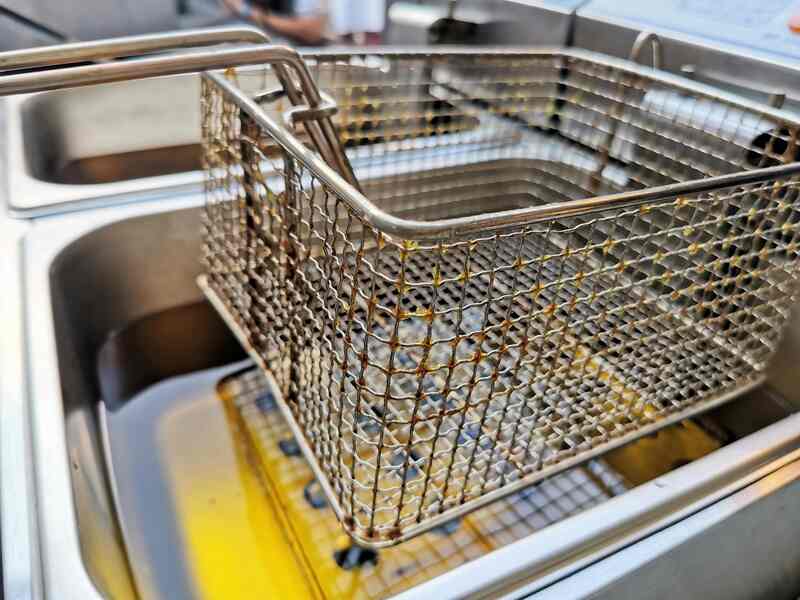
b. Drain the Oil
After the fryer has cooled down, the next step is to drain the oil using the drain valve, guiding it into an oil pan drum for proper disposal or recycling.
Before starting the oil draining process, ensure you have the necessary safety equipment such as heat-resistant gloves and goggles to protect yourself from hot oil splatters. To begin, place the oil pan drum directly under the drain valve to catch the oil efficiently.
Slowly open the drain valve to allow the oil to flow out steadily. Be cautious of any residual heat that may still be present in the fryer, as it could cause burns or discomfort.
Properly disposing of used fryer oil is crucial to avoid environmental harm. Once the oil has been drained, seal the oil pan drum securely and transport it to a designated collection point for recycling or proper disposal.
c. Scrub the Interior of the Fryer
Once the oil is drained, use a scrub brush and a suitable cleaning solution to scrub the interior of the fryer, focusing on removing any built-up grime and residue.
Be sure to choose a cleaning solution that is safe for the material of the fryer, as some chemicals may damage it.
Thoroughness is key when scrubbing, ensuring that every nook and cranny is cleaned for optimal hygiene.
Pay special attention to areas where grease tends to accumulate, such as the fryer basket and heating elements.
If the grime is particularly stubborn, let the cleaning solution sit for a few minutes before scrubbing it off.
d. Clean the Exterior of the Fryer
Using a cloth and a mixture of water and vinegar, wipe down the exterior of the fryer to remove any grease and residue, ensuring the cleaning procedures extend beyond just the interior.
Wiping down the exterior of the fryer helps in maintaining a hygienic environment in commercial kitchens where cleanliness is paramount. Vinegar is an excellent natural cleaner that not only cuts through grease effectively but also helps disinfect surfaces. Its acidic properties make it a powerful agent against bacteria and germs, ensuring a thorough clean.
Regularly cleaning the fryer’s exterior can prevent the build-up of grime and dirt, which can attract pests and contaminate food. By using vinegar for cleaning, you eliminate the need for harsh chemicals, promoting a more eco-friendly approach to hygiene.
e. Rinse and Dry the Fryer
After scrubbing and wiping down the fryer, rinse all the parts thoroughly with clean water and dry them using a kitchen roll or a clean cloth to prevent any water spots or rust.
Rinsing the fryer parts is essential as it helps to remove any leftover cleaning solution that could affect the flavour of the food. Drying thoroughly is equally important to prevent rust accumulation and extend the life of the fryer.
To make sure all parts are completely dry, consider using a microfibre cloth to reach into crevices and corners, where moisture can be hidden. For any detailed components, a gentle stream of compressed air can help remove any trapped water droplets.
Allow the parts to air dry fully before reassembling the fryer to ensure no moisture remains, which could cause potential corrosion problems.
Tips and Tricks on How To Clean Deep Fat Fryer
Aside from following the how to clean deep fat fryer explained earlier, here are some tips and tricks that can help make this task more effective:
a. How to Remove Tough Stains?
To remove tough stains from your deep fat fryer, apply a powerful cleaning solution like Pink Stuff and use a synthetic scrub pad to effectively scrub away the grime.
Before starting the cleaning process, ensure that your deep fat fryer is completely cool to avoid any risk of burns. Disconnect the fryer from the power source and remove any oil or grease residue beforehand. For the best results, consider wearing gloves to protect your skin from harsh chemicals.
Fill the fryer with hot water and add a liberal amount of the cleaning solution, ensuring it covers the stained areas. Let the solution sit for at least 30 minutes to break down the tough stains effectively. After soaking, use the synthetic scrub pad to gently scrub in circular motions, focusing on the stubborn spots.
b. How to Keep the Fryer Smelling Fresh?
To keep your deep fat fryer smelling fresh, regularly clean it with a vinegar solution, which helps to neutralise odours and maintain a clean environment.
Begin by unplugging the fryer and allowing it to cool down. Then, mix equal parts of white vinegar and water in a container. Use a sponge or cloth to wipe down the interior and exterior of the fryer with this solution. The vinegar will work to eliminate any lingering smells.
Regular maintenance is crucial to prevent odours from building up over time. A quick wipe with the vinegar solution after each use can go a long way in keeping your fryer fresh. Ensure the fryer is completely dry before storing to prevent mould growth.
For an extra boost of freshness, consider placing a bowl of bicarbonate of soda or activated charcoal near the fryer when not in use. These absorb odours efficiently and can complement the cleaning process.
That was a complete step-by-step guide on how to clean deep fat fryer to some tips and tricks that can help you to complete this task.
For restaurant owners, maintaining a clean and efficient deep fat fryer is crucial to ensuring food safety and quality. However, this task can be daunting and time-consuming.
Entrusting the cleaning of your deep fat fryer to the professionals at TEKA Cleaning is not just a convenience, it’s a necessity. Our commercial cleaning services are designed to tackle the toughest grease and grime, ensuring your equipment operates at its best. A properly cleaned fryer not only extends the life of your equipment but also enhances the taste and quality of your dishes, making a significant impact on your restaurant’s reputation.
Don’t let a dirty fryer compromise your kitchen’s efficiency and your customers’ satisfaction. Contact TEKA Cleaning today at 01233 751 544 to schedule a professional deep fat fryer cleaning service. Let us handle the mess while you focus on what you do best, delivering excellent food and service.
Read also: