Keeping your oven spotless isn’t just about the interior; clean oven racks are essential too. If you’re wondering how to clean oven racks effectively, we’ve got you covered.
This guide on how to clean oven racks will show you simple, efficient methods to remove baked-on grease and grime, making your oven racks shine like new. With a few household items and some patience, you can restore your oven racks to their original sparkle, enhancing your overall kitchen cleanliness.
From using natural cleaning solutions to commercial oven cleaners, Let’s dive deeper into it!
Different Methods of How To Clean Oven Racks
There are several effective methods for cleaning oven racks, each of which can address different levels of dirt and grime, such as:
a. Using Natural Cleaning Solutions
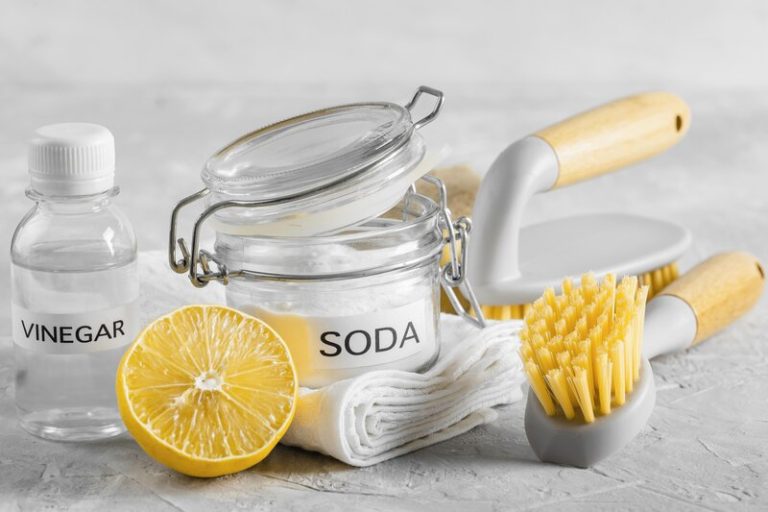
Using natural cleaning solutions like bicarbonate of soda and vinegar is an eco-friendly and effective way to clean oven racks. The process involves soaking the racks in a tub or bath filled with hot water and a mixture of these natural agents.
Start by creating a paste of bicarbonate of soda and water to cover the racks evenly. Then, pour vinegar into a spray bottle. Place the racks in the tub and cover them with the paste. Apply vinegar on top and let it sit for at least half an hour to loosen the grime.
Next, allow the racks to soak for a few hours or overnight to ensure the dirt and grease are effectively dissolved. This prolonged soaking period helps in making the scrubbing process easier.
After soaking, use a brush or sponge to scrub off the loosened dirt. Rinse the racks thoroughly with hot water and dry them before replacing them in the oven.
Using these eco-friendly products not only cleans your oven racks efficiently but also ensures a chemical-free and safe environment for your home and family. These natural agents are cost-effective and readily available in most households.
b. Using Commercial Oven Cleaners
Commercial oven cleaners are specifically formulated to tackle tough grease and grime on oven racks, making the cleaning process quicker and more efficient.
When using a commercial oven cleaner, start by carefully following the manufacturer’s instructions on the product label for best results. It’s important to wear gloves and ensure proper ventilation in the area while applying the cleaner to avoid any respiratory irritation.
Once the cleaner is applied, allow it to sit for the recommended amount of time to penetrate and break down the grease and grime buildup. This waiting period is crucial for the effectiveness of the cleaner against stubborn stains.
After the recommended waiting time, use a damp sponge or cloth to wipe away the cleaner and dissolved grime from the oven surfaces. Thoroughly rinse the oven racks and interior with clean water to remove any residue and leftover cleaner before using the oven again.
c. Using Self-Cleaning Function
Many modern ovens come with a self-cleaning function that can effectively clean oven racks by burning off grime and residue at high temperatures.
Before utilising the self-cleaning function, ensure you remove any large food debris from the oven. It’s important to read the manufacturer’s instructions carefully to understand the specific requirements of your oven model.
When activating the self-cleaning mode, the oven will lock automatically for safety reasons. This process usually lasts for a few hours, during which the oven heats up significantly to burn off the accumulated grime.
After the cleaning cycle is complete, allow the oven to cool down before opening. You may notice ash residue inside, which can be wiped off with a damp cloth or sponge.
By using the self-cleaning function, you significantly reduce the need for manual scrubbing and harsh cleaning chemicals, making oven maintenance much easier and more convenient.
Steps on How To Clean Oven Racks
Cleaning oven shelves involves a series of steps that ensure the thorough removal of grime and grease, including:
a. Preparing the Cleaning Solution
The first step in cleaning oven racks is to prepare the cleaning solution, which can be a mixture of bicarbonate of soda and vinegar or washing-up liquid and hot water.
To create the bicarbonate of soda and vinegar solution, you should start by mixing the bicarbonate of soda with water to create a paste-like consistency. Once the paste is ready, apply it generously onto the oven racks, ensuring complete coverage. Leave this mixture on for a few hours or overnight to allow it to break down the grime and grease effectively.
Alternatively, if you opt for the washing-up liquid and hot water solution, you’ll need to dilute the washing-up liquid in hot water in a bucket or sink. Submerge the oven racks in this soapy solution and let them soak for a few hours. This solution is particularly effective at cutting through grease and grime.
It’s important to wear gloves and work in a well-ventilated area when preparing these solutions due to the potency of the ingredients. Always test a small area first to ensure compatibility with your specific oven rack material.
b. Removing the Oven Racks
Carefully remove the oven racks from the oven, ensuring you do not damage them or your home surroundings in the process.
To safely remove the oven racks, start by making sure the oven is completely turned off and cool to the touch. Pull the oven rack towards you, using both hands for balance. Avoid yanking or forcing the racks out, as this could lead to bending or warping. For stubborn racks, gently wiggle them back and forth while applying even pressure. Protect your floors and worktops by having a soft surface nearby to place the racks on once removed. Remember, handling them delicately can prolong their lifespan.
c. Soaking the Racks
Once removed, place the oven racks in a tub or bath filled with hot water and the prepared cleaning solution to soak.
It is recommended to let the oven racks soak for at least 2-4 hours to allow the cleaning solution to break down the grime and grease effectively. This soaking time softens the residue, making it easier to scrub off later.
The benefits of soaking are remarkable. Not only does it make cleaning easier and quicker, but it also helps to maintain the racks’ longevity by preventing corrosion.
To enhance the soaking process, you can add a few drops of washing-up liquid or bicarbonate of soda to the solution. Plastic tubs, large containers, or even bin liners can serve as versatile soaking vessels for the oven racks.
d. Scrubbing the Racks
After soaking, use a scrub brush or an abrasive pad to scrub the oven racks, focusing on areas with stubborn grime and grease.
For effective scrubbing, ensure that the scrub brush or abrasive pad is damp but not overly wet to avoid excess moisture during the cleaning process. Scrubbing vigorously in a circular motion can help loosen up tough residue effectively. When dealing with burnt-on stains, sprinkle a generous amount of bicarbonate of soda on the affected areas before scrubbing to assist in breaking down the grime.
Remember to pay extra attention to the corners and crevices of the oven racks, as dirt and grease tend to accumulate in these hard-to-reach spots. A thorough scrubbing is essential to ensure that all residue is removed, resulting in clean and hygienic oven racks for your next use.
e. Rinsing and Drying the Racks
Once scrubbing is complete, rinse the oven racks thoroughly with hot water to remove any remaining cleaning solution and debris.
Ensuring all traces of the cleaning solution are removed is crucial to prevent any chemical residue from getting into your food while cooking. It is recommended to thoroughly inspect the racks under good lighting to check for any lingering grime or soap suds.
To dry the racks completely, you may place them in a well-ventilated area or use a clean towel to pat them dry. Another effective method is to use a hairdryer on low heat to ensure all moisture is removed before placing them back inside the oven.
How to Clean Oven Racks Effectively ?
Effectively cleaning oven racks can be achieved using various methods that cater to different levels of stains and grime, such as:
a. Using Baking Soda and Vinegar
Bicarbonate of soda and vinegar creates a powerful cleaning solution that effectively breaks down grime on oven shelves.
When using this dynamic duo for cleaning, start by making a paste using bicarbonate of soda and water. Apply this paste generously onto the oven shelves, ensuring each shelf is well-coated. Let the paste sit for at least 30 minutes to allow the mixture to work its magic. After soaking, take a sponge or brush and scrub the shelves thoroughly to remove any stubborn residue.
One of the main benefits of using bicarbonate of soda and vinegar for cleaning is that they are natural and eco-friendly ingredients, void of harsh chemicals. This method is cost-effective and safe to use around pets and children.
b. Using Dish Soap and Dryer Sheets
Combining washing-up liquid with tumble dryer sheets is an unconventional yet effective method for removing grease and grime from oven shelves.
To utilise this method, you can start by filling a bath or large container with warm water and adding a few squirts of washing-up liquid. Submerge the oven shelves in the soapy water and place a couple of tumble dryer sheets on top. The combination of the liquid’s degreasing properties and the dryer sheets’ fabric-softening elements helps break down tough grime and grease. Let the shelves soak for a few hours or overnight for best results. Remember to wear gloves to protect your hands from chemicals.
c. Using Ammonia and Garbage Bags
Using ammonia in rubbish bags is a method designed to tackle the most stubborn stains and baked-on grime on oven shelves.
Begin by ensuring you are in a well-ventilated area and wearing gloves and eye protection. Place the oven shelves in a large rubbish bag. Pour ammonia over them, ensuring they are fully coated. Seal the bag tightly to prevent fumes from escaping. Leave the shelves to soak overnight to allow the ammonia to work its magic
The next day, carefully open the bag outdoors to avoid inhaling the fumes, then scrub the shelves with a sponge or brush to remove the loosened grime. Rinse the shelves thoroughly before returning them to the oven.
How Often Should You Clean Your Oven Racks?
Experts recommend cleaning your oven racks every few months or more frequently if you use your oven regularly, to maintain optimal performance and hygiene in your home.
Regular cleaning not only enhances the longevity of your oven but also prevents grease build-up, which can lead to unpleasant odours and potential fire hazards.
Signs that indicate it’s time to clean your racks include visible food debris, uneven heating, or smoke when the oven is in use.
For light to moderate usage, a deep clean every three to four months is sufficient, while heavy usage may require monthly cleaning.
That’s a complete step-by-step guide on how to clean oven racks with a selection of different methods you can choose from. While these DIY solutions can help, achieving a thorough and spotless clean often requires professional attention.
TEKA Cleaning’s residential cleaning services are designed to handle the toughest grime and grease with ease. Our expert team uses advanced techniques and specialised equipment to ensure your oven racks and kitchen are sparkling clean.
Don’t struggle with stubborn stains—contact TEKA Cleaning today at 01233 751 544 for a deep, professional clean that makes your kitchen shine!
Read also:


