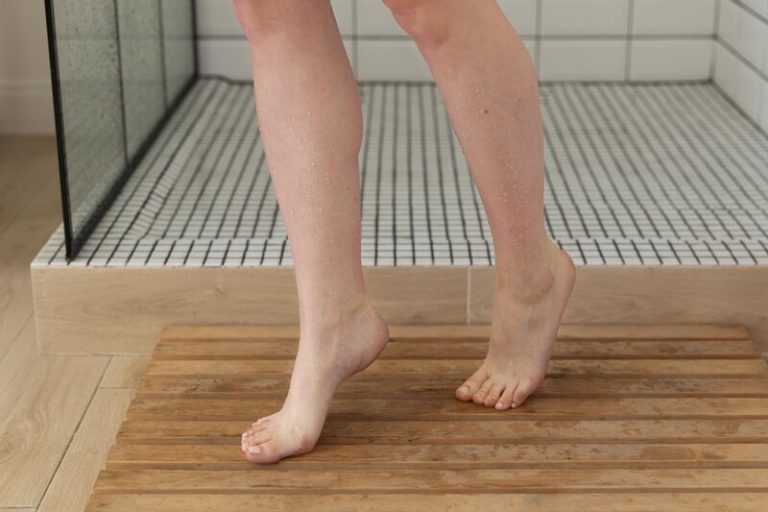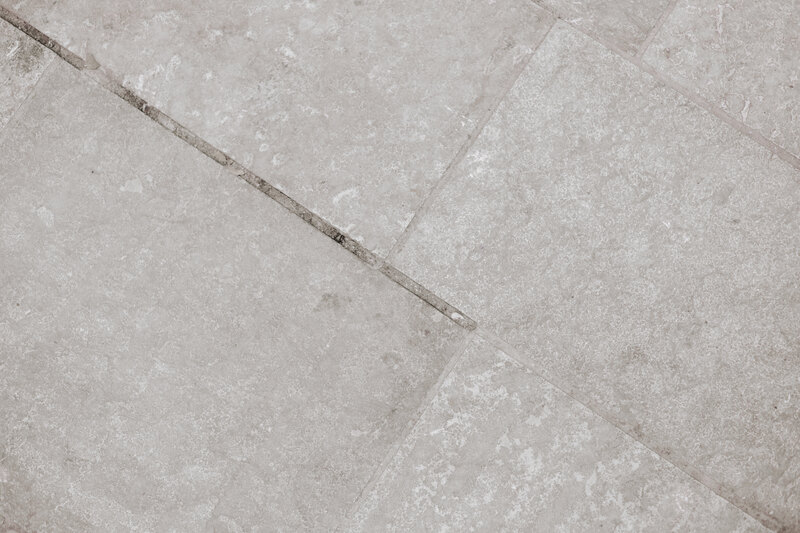
Are you tired of seeing dirty grout lines on your floor tiles? It’s time to understand how to clean grout on floor tiles and roll up your sleeves to clean them well!
In this article, we will discuss how to deep clean grout, its importance, and what can happen if you neglect this task. If you are confused about what is the best home remedy for cleaning grout, we will also provide a complete guide below.
Stay tuned for a full explanation of how to clean grout on floor tiles and get ready to enjoy sparkling tiles once again!
The Importance of Cleaning Grout on Floor Tiles
Before going further into how to clean grout on floor tiles, let’s first discuss the importance of this activity. Basically, cleaning grout on floor tiles is crucial for maintaining the appearance and hygiene of your floors.
Over time, grout can accumulate dirt, grime, and mould, leading to a dull and unclean look in your living spaces. Properly cleaned grout not only enhances the aesthetic appeal of your floors but also prevents the growth of harmful bacteria and allergens, promoting a healthier indoor environment for you and your family.
By regularly cleaning the grout, you can extend the lifespan of your tiles and prevent costly repairs or replacements. Dirty grout can also harbour stubborn stains that disrupt the overall cleanliness of your floors, making them harder to maintain and keep looking fresh.
Tools and Materials That You Need for Cleaning Grout on Floor Tiles
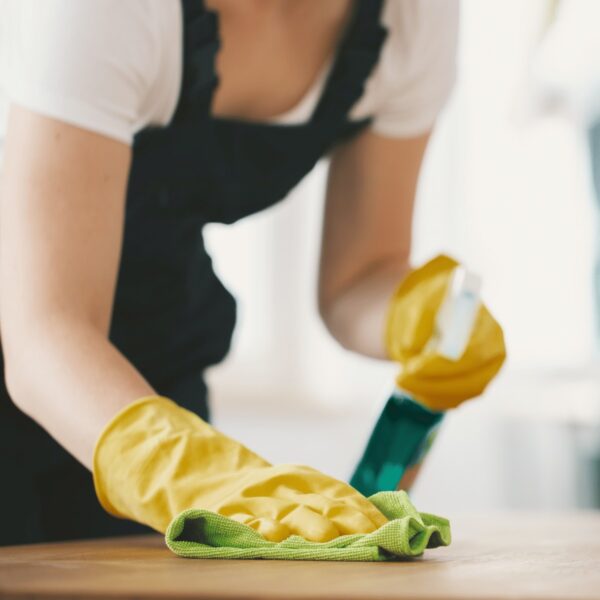
When learning how to clean grout on floor tiles, of course you need to know what tools and materials are needed. To effectively clean grout on floor tiles, you need a set of essential tools and materials that facilitate thorough cleaning and maintenance, such as:
a. Broom or Vacuum Cleaner
Before starting the grout cleaning process, ensure to sweep or vacuum the floor tiles to remove any loose dirt, debris, or dust that may interfere with the cleaning. Using a broom or vacuum cleaner on the surface will prepare the grout lines for a more effective and detailed cleaning process.
Pre-cleaning the floor tiles is a crucial step in the overall maintenance of your flooring. Removing surface debris not only enhances the appearance of the tiles but also sets the stage for a thorough grout cleaning.
This preliminary action helps prevent dirt particles from being pushed into the grout lines during the cleaning process, ensuring a more pristine result.
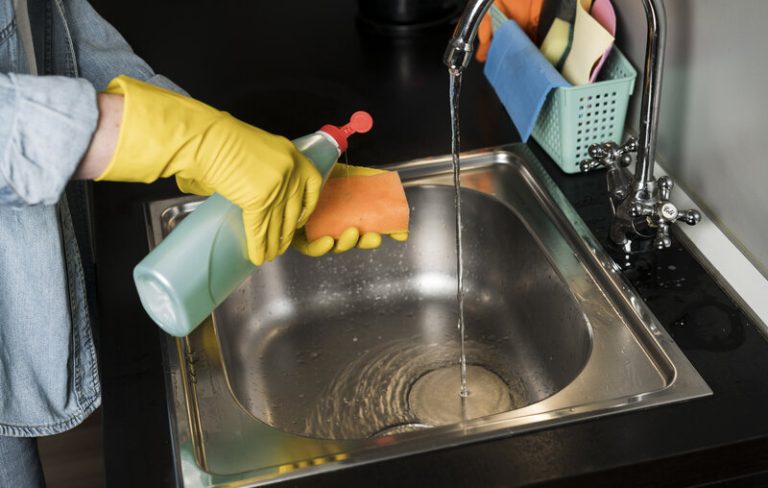
b. Grout Cleaner
A quality grout cleaner is essential for effectively removing stubborn dirt, grime, and stains from the grout lines of your floor tiles.
Choose a cleaner that is suitable for your tile type and grout colour to ensure thorough cleaning without causing damage. Apply the cleaner according to the manufacturer’s instructions for optimal results.
Using the right grout cleaner not only helps in maintaining the aesthetics of your tiles but also plays a crucial role in preserving the hygiene of your living spaces.
With proper grout cleaning, you can prevent mould and mildew buildup, which are common issues in areas with high moisture levels. Regular cleaning with an effective cleaner can prolong the lifespan of your grout and tiles, saving you the hassle and cost of repairs or replacements.
c. Scrub Brush
A durable scrub brush is a valuable tool for agitating and dislodging dirt and grime from the grout lines during the cleaning process. The stiff bristles of the brush help to loosen stubborn stains and residues, allowing the cleaner to penetrate deeper and achieve a thorough clean. Use the scrub brush with moderate pressure to avoid damaging the grout.
Regarding cleaning tools, the scrub brush stands out as a versatile and effective option for tackling grout cleaning. Its bristles work efficiently to reach into the narrow spaces of the grout lines, ensuring a comprehensive removal of dirt and grime.
By gently scrubbing back and forth along the grout, the brush’s design facilitates the dislodging of even the most embedded particles.
The importance of using a scrub brush lies in its ability to provide a deep clean without causing harm to the grout itself. This gentle yet thorough cleaning technique is essential to maintain the integrity of the grout lines while achieving a sparkling finish.
d. Bucket
Having a bucket of warm water is essential for rinsing and cleaning the grout lines after applying the cleaner and scrubbing. The water helps to wash away the loosened dirt and residues, leaving the grout fresh and clean. Ensure the water is warm but not too hot to avoid damaging the grout.
When using warm water, it enhances the cleaning process by effectively breaking down the grime and ensuring a thorough rinse. The contrast in temperature can also help to dislodge stubborn residues that cold water might not remove.
It’s crucial to change the water in the bucket regularly to maintain its effectiveness, as dirty water can reintroduce grime back onto the grout lines. Proper water usage plays a vital role in preserving the integrity of the grout and preventing mould growth by removing all cleaning agents completely.
e. Warm Water
Warm water serves as a natural and effective solvent for rinsing and cleaning grout lines, helping to remove dirt, grime, and cleaning residues.
When used in combination with a gentle scrubbing action, warm water can enhance the cleaning process and leave the grout looking fresh and revitalised. Ensure the water temperature is comfortable for handling during the cleaning.
Warm water aids in loosening stubborn stains and buildup without the need for harsh chemicals, making it a more eco-friendly and cost-effective cleaning solution. Its gentle yet powerful nature makes it suitable for various types of grout, ensuring a thorough cleaning without causing damage.
The warmth of the water also promotes faster drying of the grout lines, preventing the growth of mould and mildew. By incorporating warm water into your regular grout cleaning routine, you can maintain the cleanliness and longevity of your tiled surfaces effortlessly.
f. Old Toothbrush
An old toothbrush can be repurposed as a handy tool for detailed and intricate cleaning of grout lines.
The small bristles of the toothbrush enable you to reach narrow and tight spaces where larger brushes may not be effective.
What makes the toothbrush particularly effective for grout cleaning is its ability to provide precise and detailed cleaning, ensuring that every nook and cranny is thoroughly scrubbed and dirt-free.
Using an old toothbrush allows you to apply the perfect amount of pressure needed to tackle tough stains without damaging the delicate grout surface. It’s a versatile and eco-friendly alternative to specialised cleaning tools, offering convenience and efficiency in maintaining sparkling clean tile surfaces.
g. Microfiber Cloth
A microfibre cloth is ideal for wiping and drying grout lines after cleaning to remove excess moisture and cleaning residues.
The soft and absorbent properties of microfibre cloth make it a versatile tool for the final steps of grout cleaning. Its ability to efficiently absorb moisture ensures that the grout lines are left clean and dry, without any water streaks or residue.
By using a gentle patting and wiping motion with the cloth, you can achieve a pristine finish on the grout surface. This step is crucial in ensuring that the cleaning process is completed effectively, leaving your tile surfaces looking spotless and well-maintained.
How to Clean Grout on Floor Tiles
Following a systematic approach is essential for achieving a thorough and effective cleaning of grout on floor tiles. By adhering to a step-by-step guide, you can ensure that each stage of the cleaning process is executed meticulously, resulting in clean and revitalised grout lines that enhance the overall appearance of your floors.
Here is a detailed explanation of how to clean grout on floor tiles that can be understood. The following guide can also be used for cleaning grout on bathroom floors and other places in the house, including the kitchen and so on.
So if you’re wondering how to clean kitchen floor grout between tiles, follow these steps step by step until the end.
a. Sweep or Vacuum the Floor
Before beginning the grout cleaning process, start by sweeping or hoovering the floor to remove loose debris, dust, and dirt. This initial step ensures that the grout lines are free from surface contaminants, allowing for a more effective cleaning process.
By clearing the floor of loose debris, you create a clean canvas for the grout cleaning to work its magic. The effectiveness of the cleaning process greatly depends on the initial prep work. Not only does pre-cleaning enhance the appearance of your floors, but it also plays a crucial role in maintaining the longevity of the grout and tiles.
Using appropriate cleaning tools alongside sweeping or hoovering contributes to a smoother and more successful grout cleaning job. Starting with a clean surface ensures that the grout cleaner can penetrate deep into the grout lines, achieving optimal results.
b. Apply Grout Cleaner
Once the floor is prepped, apply the chosen grout cleaner liberally along the grout lines, ensuring complete coverage. The cleaner begins to break down dirt and stains, preparing the grout for scrubbing and removal of residues. Allow the cleaner to sit for the recommended time to achieve optimal results.
During this time, the active ingredients in the grout cleaner penetrate deeply into the porous grout, loosening and dislodging tough grime. It’s crucial to follow the manufacturer’s instructions precisely for the best outcomes.
As the cleaner works its magic, you can already notice the initial transformation, with stubborn stains starting to fade. This dwell time is essential for a thorough cleansing process, allowing the product to do its job effectively.
After allowing the cleaner to sit, grab a stiff-bristled brush and start scrubbing the grout lines in a back-and-forth motion. The dirt and residues should now come off more easily, revealing clean and refreshed grout underneath.
Remember, consistency in applying the cleaner and methodical scrubbing are key to ensuring all grime is lifted from the grout lines. This attention to detail will leave your tiled surfaces looking revitalised and pristine.
c. Scrub the Grout Lines
Using a scrubbing brush or an old toothbrush, scrub the grout lines vigorously to dislodge dirt, grime and stains. Focus on each section of the grout, applying moderate pressure to ensure thorough cleaning. Scrub in circular motions or back and forth to reach all areas effectively.
Consistency is key when it comes to scrubbing grout lines; make sure to maintain a steady rhythm throughout the process. Scrubbing diagonally can sometimes help target stubborn spots that need extra attention.
Remember, using an appropriate cleaning solution can help in loosening tough stains, making them easier to remove. Once you’ve thoroughly scrubbed the grout lines, rinse the area with water to wash away the loosened dirt and residue.
d. Rinse with Warm Water
After scrubbing, rinse the grout lines thoroughly with warm water to remove the loosened dirt, grime, and cleaning residues. Use a bucket of warm water or a clean cloth to wipe away the cleaning solution, ensuring that the grout is left clean and residue-free. Repeat the rinsing process as needed to achieve a sparkling finish.
Rinsing with warm water is crucial as it helps in dissolving any remaining cleaning products, ensuring a pristine appearance. The warm water assists in loosening any stubborn residues left behind during the scrubbing process and prevents them from re-adhering to the grout lines.
Maintaining an optimal water temperature aids in creating a hygienic environment by eradicating bacteria and mould that might have accumulated. Thorough rinsing not only enhances the aesthetic appeal but also prolongs the lifespan of the grout by preventing the buildup of grime and mould.
e. Dry and Seal the Grout
Once the grout lines are thoroughly cleaned and rinsed, it is essential to dry them completely to prevent moisture build-up. Use a microfibre cloth or allow the grout to air dry naturally before considering sealing. Sealing the grout after cleaning helps maintain its cleanliness and prolongs the effectiveness of the cleaning process.
Properly dried grout lines are crucial to avoid any trapped moisture that can lead to mould and mildew growth. Moisture retention not only impacts the appearance of the grout but also compromises the structural integrity over time.
By ensuring thorough drying, you create an optimal surface for applying a high-quality grout sealing product. Sealing not only enhances the aesthetic appeal of the grout but also acts as a protective barrier against future stains and spills, making maintenance easier in the long run.
Tips for Maintaining Clean Grout on Floor Tiles
Ensuring the long-term cleanliness and appearance of grout on floor tiles requires consistent maintenance and care.
One effective tip to keep your grout in top condition is to seal it regularly. This protective barrier helps repel moisture and dirt, reducing the chances of discolouration and mould growth.
Incorporating a weekly cleaning routine using a gentle pH-neutral cleaner can prevent grime buildup and maintain the grout’s original colour.
An often overlooked practice is to wipe down wet areas immediately to prevent water stains. This simple habit can make a significant difference in the overall cleanliness of your grout lines.
Conclusion
This is a complete explanation of how to clean grout on floor tiles. In conclusion, regular cleaning and maintenance of grout on floor tiles is essential to keep your floor clean, sanitary and longevity.
By following the right cleaning techniques, using appropriate tools and materials, and staying consistent with cleaning routines, you can ensure that your grout remains fresh, clean, and appealing for years to come.
Proper grout maintenance not only enhances the aesthetic appeal of your floors but also prevents the accumulation of dirt, mould, and stains, which can degrade the quality of your tiles over time.
Neglecting grout cleaning can lead to discolouration, deterioration, and even potentially costly repairs down the line.
It’s crucial to establish a regular cleaning schedule, perhaps incorporating it into your weekly or bi-weekly cleaning routine, to maintain the pristine condition of your tile floors.
To avoid the hassle and potential expenses of repairing or replacing damaged tiles, consider making grout maintenance a priority.
However, if you find that the task is too time-consuming or difficult, why not let the professionals handle it? TEKA Cleaning offers specialised house cleaning services that can restore the look of your tiles and extend their life, all without you having to lift a finger.
Book now or give us a call on 01233 751 544 and let us take care of your tile grout cleaning needs. Our expert team uses the best tools and cleaning solutions to ensure that your grout is not only clean but also protected from future damage.
Entrust your floor maintenance to TEKA Cleaning and enjoy more free time for yourself. Let us take that one last thing off your list and provide you with the peace of mind that comes from knowing your home is in expert hands. Choose TEKA Cleaning, where we treat your home like our own.
Read also: